Making homemade sauerkraut is easy, budget friendly and also a pretty rewarding experience. This homemade super-food is packed full of vitamins, minerals, and tons of gut-friendly probiotics.
Sauerkraut is known to help regulate digestion, strengthen the immune system, and may even help you lose weight. In fact, 2 ounces of homemade sauerkraut has more probiotics then about 100 probiotic capsules! Have I convinced you that you need to start making homemade sauerkraut yet?
What is Sauerkraut?
Old-fashioned sauerkraut consists of cabbage that’s been thinly sliced and mixed with salt to create it’s own brine, and is then left out to lacto-ferment. Though it may sound like I’m referring to dairy, “Lacto” refers to a specific species of bacteria called Lactobacillus.
Where Does Sauerkraut Originate From?
The name sauerkraut originates from Germany. Sauer, meaning sour, and Kraut being the German word for cabbage. Sauerkraut has been a staple in Germany for as far back as the 1600’s.
But, contrary to common belief, it did not originate from Germany. Similarly, some 2,000 years ago the Chinese were known to ferment cabbage in rice wine.
But It wasn’t until the 16th century that the Europeans first began fermenting cabbage in its own brine solution. This invention would be what we know today as sauerkraut.
Homemade Sauerkraut Vs. Store Bought
The way I see it the more stuff you learn to make or grow at home the better. At the end of the day we are all just humans that need to eat to survive. Yet, most people don’t know how to grow or prepare their own food.
Most fermented foods purchased from grocery stores or supermarkets have lost most, if not all beneficial, living bacteria.
And It is estimated that our food travels about 1,500 miles to get from farm to supermarket. Transporting food over these long distances generates large quantities of carbon emissions.
Furthermore, in order for food to be transported such long distances, most is picked while still unripe and then gassed to “ripen” it after transport.
As well as being highly processed in factories using preservatives, irradiation, and other means to keep it stable until it reaches your nearest supermarket. Doesn’t this all sound delicious?
Increase Your Food Security
So, by making or growing your own food at home you are not only cutting back on unnecessary carbon emissions, you are also providing your family with food security and better, healthier food.
Rather then solely relying on the grocery stores, which let’s be honest with ourselves here, haven’t been very reliable lately. Empty shelves, items out of stock, limits on how many of an item you are allowed to purchase. Who wants to deal with that?
So, not only is growing and making your own food more convenient, it’s also a much healthier option.
Healthier Food = Healthier Body
For instance, by growing your own produce you have the ability to steer clear of toxic fertilizers, pesticides and other harmful chemicals. Most produce from the grocery store has been treated with these truly unnecessary additives since day 1.
Therefore, by making your own food you are able to use natural preservation methods without the use of harmful chemicals.
Additionally, you are in control of everything that you are adding in and can tailor the taste to your personal preference. For instance, you may think sauerkraut from the store is too sour, by making it yourself you could be doing taste tests daily and then stopping the fermentation process whenever you think the flavor is best.
Why Should I Add Fermented Foods To My Diet?
If my intro hasn’t already convinced you, allow me to dig deeper into why fermented foods are so important.
Eating foods that support your gut’s healthy bacteria is widely believed to be the key to better health.
Prior to the days of mass food production and modern refrigeration, fermentation was a common practice in many households. From homemade vinegars to sourdough breads to various fermented vegetables.
Recently fermentation has been making a come-back and is rapidly becoming a health trend in modern society. However, most American households actually have very little “living foods” available.
This is due to the cooking process, pasteurization or preservatives added in order to keep it “fresh”, safe, and allows the food to have a long shelf-life. Hence why it is so important to learn to make it yourself!
Health Benefits of Fermented Foods
#1. Gut Health.
Fermented foods are easier to digest due to the sugars and starches having been broken down through the fermentation process.
Sauerkraut, along with other fermented foods, are amazing for promoting beneficial bacteria for your gut. Lately It seems like people see the word “bacteria” and lose their minds, but not all bacteria is bad guys.
Our bodies are home to an estimated 100 trillion good, beneficial bacteria. These bacteria are actually essential for our survival. Good bacteria help our bodies digest food and absorb nutrients. These bacteria also produce several vitamins in the intestinal tract — including niacin, folic acid, vitamins B12 and B6.
Additionally, sauerkraut contains dietary fiber which helps digestion, balances blood sugar, and can even help lower cholesterol. Regularly eating sauerkraut may help reduce symptoms of Irritable Bowel Syndrome (IBS).
Adding sauerkraut to your diet can give you the ability to make and possibly even grow your own probiotics, right at home.
#2. Immune Function
A large proportion of immune function comes from the gut. By consuming fermented foods, you are supporting the mucosa (the fancy name for the lining in your gut).
This lining acts as a natural barrier, helping the immune system to become stronger. Homemade sauerkraut is high in vitamin C, a vitamin essential for supporting the immune system.
A lack of this beneficial bacteria allows disease causing microbes to grow which then causes inflammation in our gut. If you have recently taken antibiotics, probiotic foods are a excellent way to get back that good flora that your body worked so hard for.
#3. Mood Enhancer
Who would have thought that a lack of bacteria in your gut could be the reason you’ve been grumpy lately? Our brains are linked to out gut through the hypothalamic-pituitary-adrenal (HPA) axis. Technically called the enteric nervous system, the gut is lined with neurons that influence our emotions and feelings.
Here is a great article I found from the National Library of Medicine. This article digs even deeper into regular consumption of sauerkraut and its effects on the human body. They cover everything from sauerkraut treating cloudy eyes, to upping a breastfeeding mother’s milk supply and even…hangovers?
Tips For Making Homemade Sauerkraut
- Always use fresh cabbage. Like all things homemade, the better your ingredients the better your final product will be. During the summer months I like to get my cabbage locally from farm-stands or farmer’s markets, but in the winter I get them from the grocery store.
- A food processor is a game changer. The first few times I made my homemade sauerkraut I shredded it using only a large kitchen knife. This worked fine but It did take much longer. I now like to stick to my trusty food processor for helping me speed things up a bit. If you don’t have access to a food processor just slice the cabbage up as fine as you can.
- Never use an iodized or refined table salt when creating any of your ferments. Examples of these would be table salt, kosher salt, or pickling salt. Mineral rich or sea salts work the best when creating your brine.
- Let your first batch ferment for 2-3 days. The longer you allow your homemade sauerkraut to ferment the more sour it will taste. So around 3 days is a good place to start.
How To Make Homemade Sauerkraut
Alright, let’s jump into it!
Tools You May Need:
- Large Mixing Bowl
- Knife or Food Processor
- 1 Quart Mason Jar
- 1 Pint Mason Jar
- Glass Fermenting Weight or a Clean Rock and Sandwich Bag
Ingredients:
- 2 Heads of Cabbage
- Roughly 21/2 Tablespoons of Sea Salt or Mineral Rich Salt.
Directions:
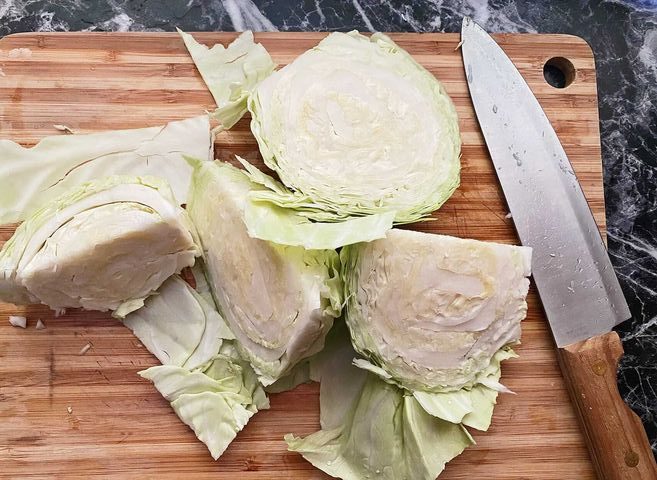
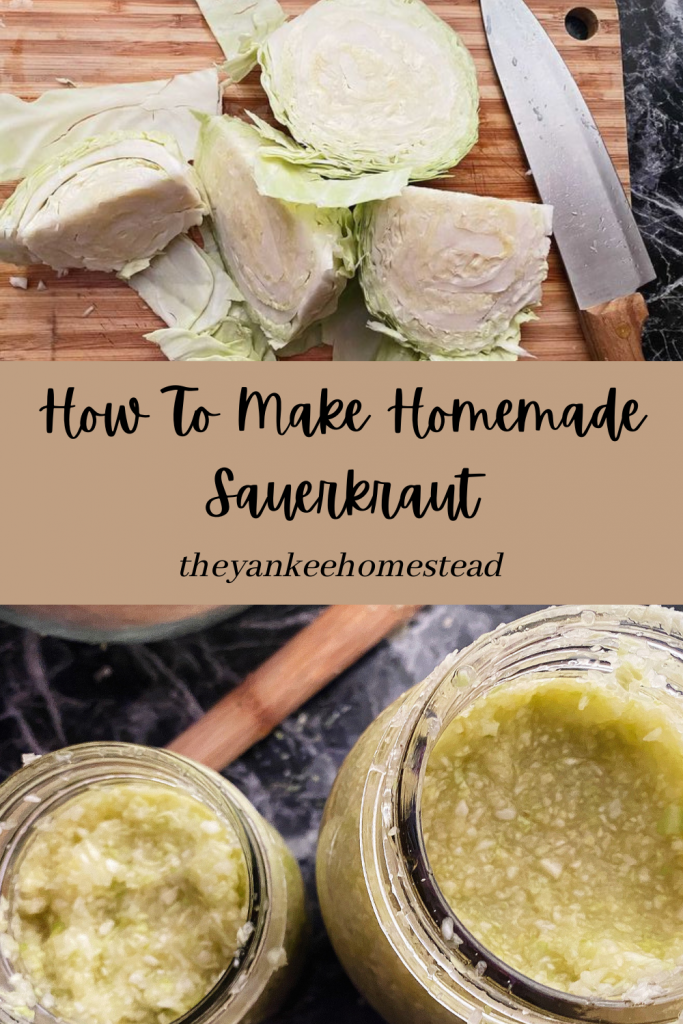
Step 1: After washing your cabbage, take off the first couple of outside leaves and set aside, we’ll be using these later.
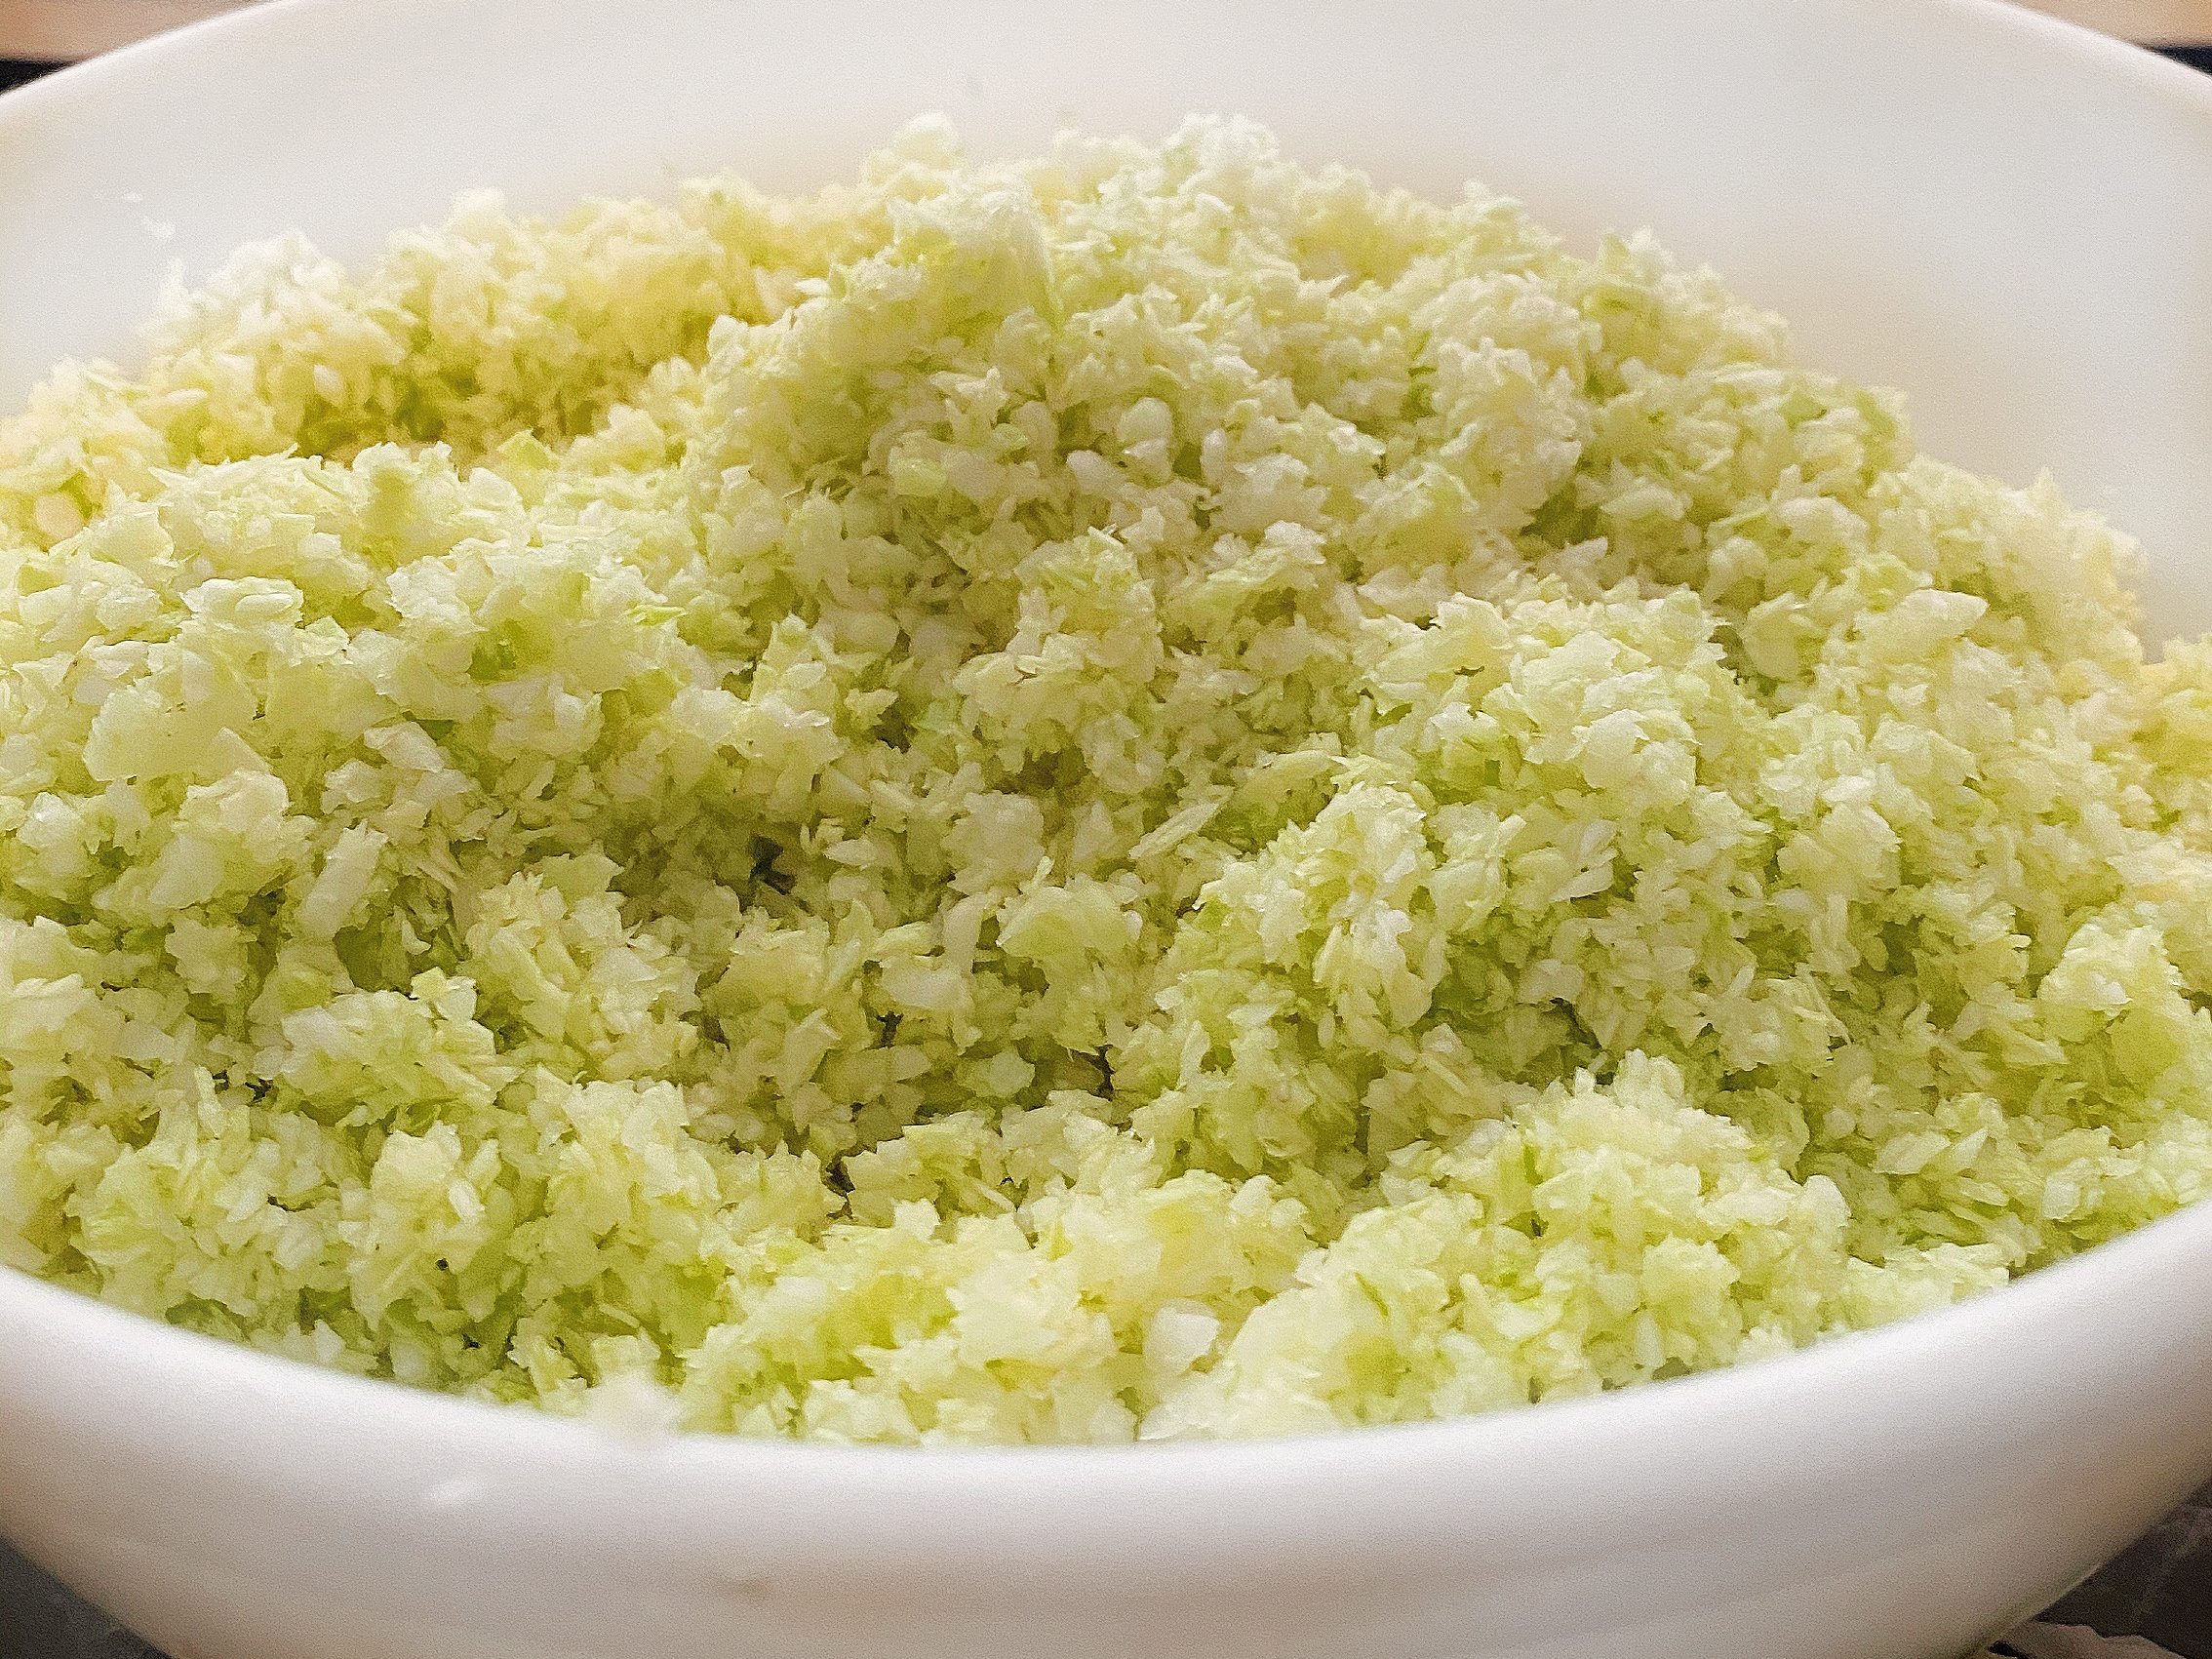
Step 2: After washing and removing the first couple of leaves, shred your cabbage. Then, using either your food processor or a knife, shred your cabbage as small as possible. For myself I like to shred my homemade sauerkraut very fine. I think it has a better taste and texture this way. However, traditional sauerkraut is a bit more stringy. You can achieve this by using the medium size holes on a cheese grater.
Step 3: Next, transfer your shredded cabbage to your large mixing bowl and add in your 2 Tablespoons of mineral or sea salt.
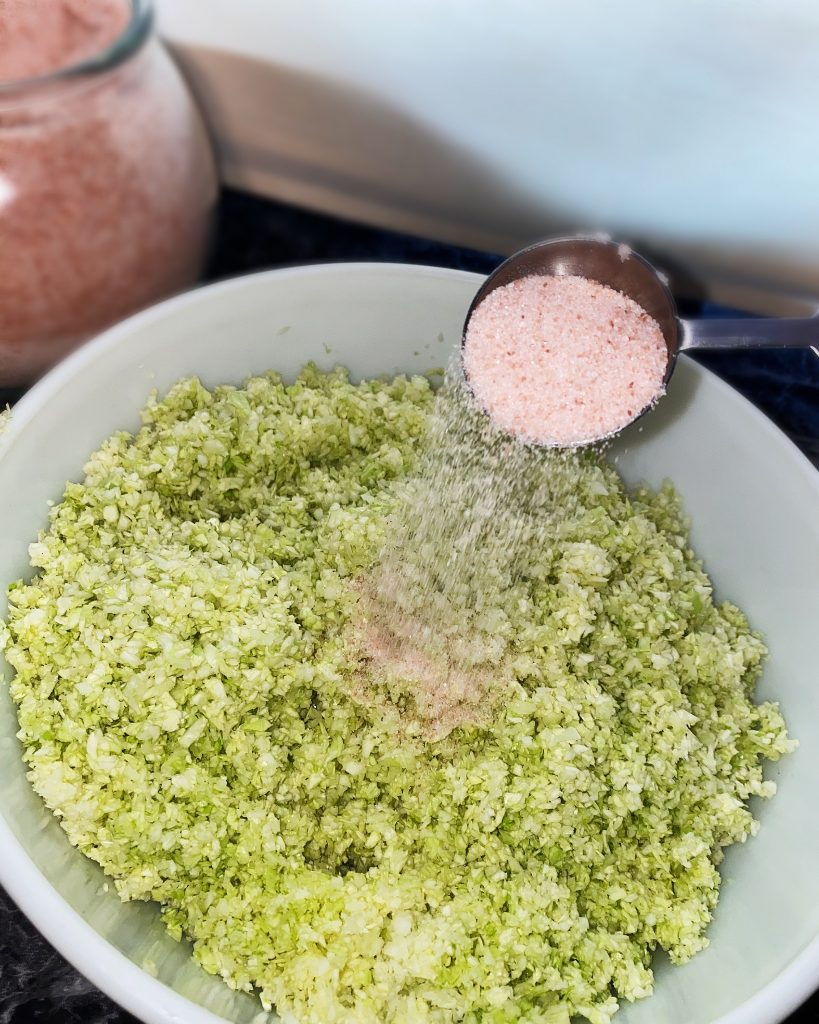
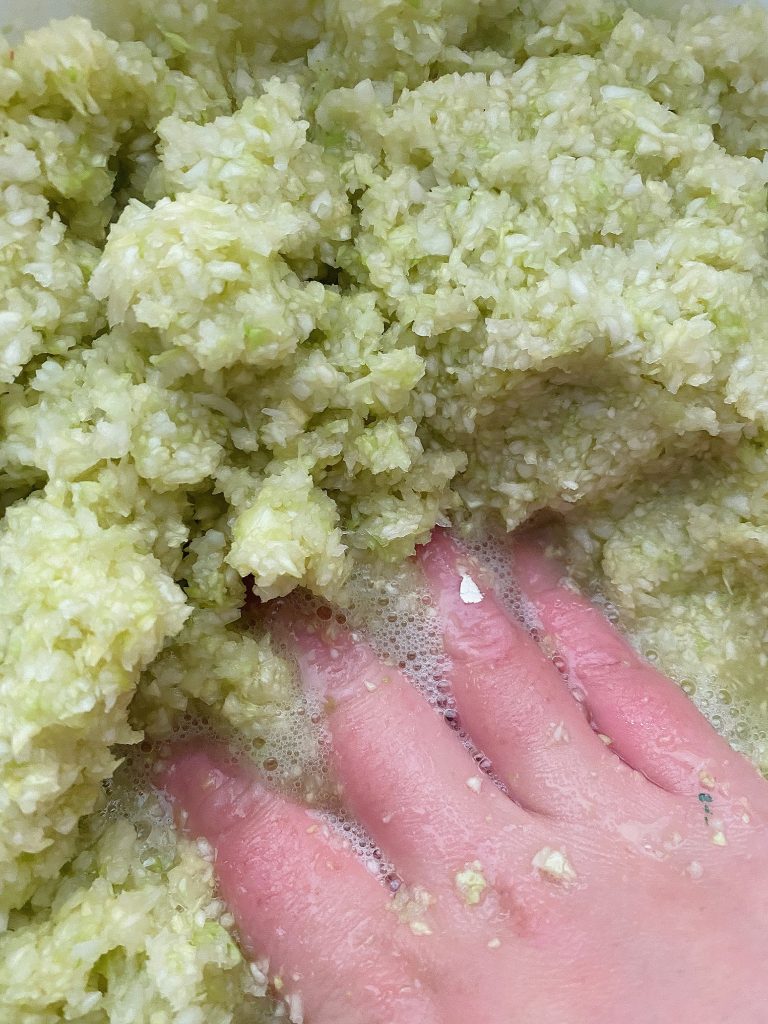
Step 4: Now, using your hands work the salt into the shredded cabbage until it gets very juicy. This juicy mixture is your “brine”. This process can take up to 10 minutes so be patient and keep working the salt and cabbage mixture together.
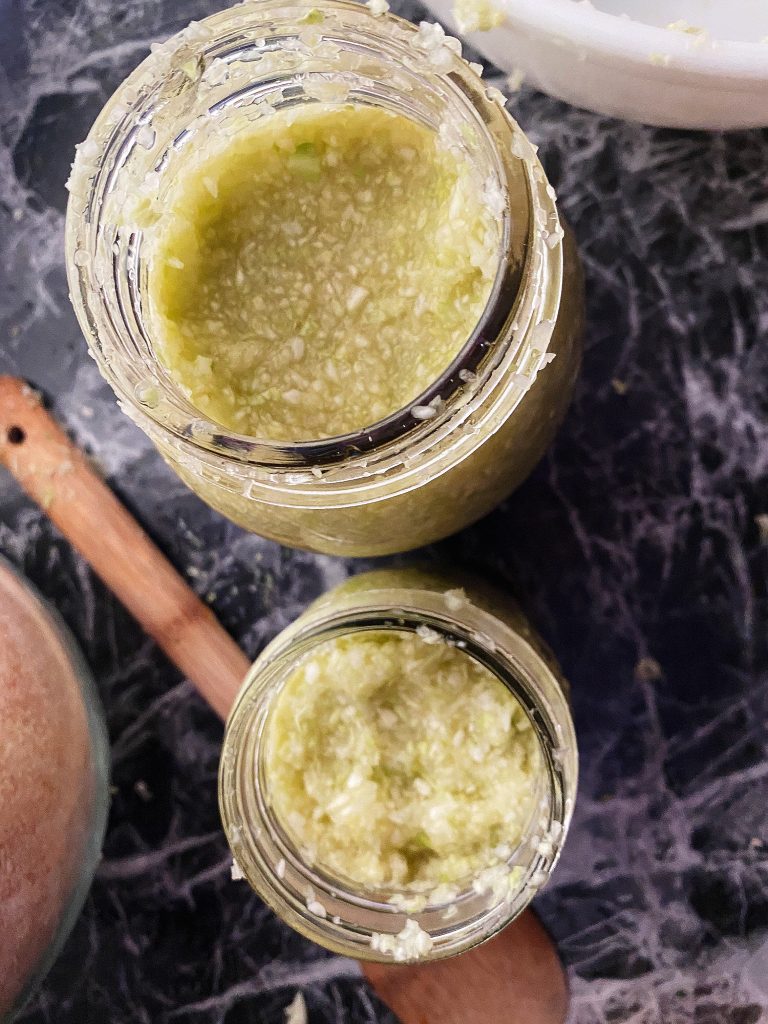
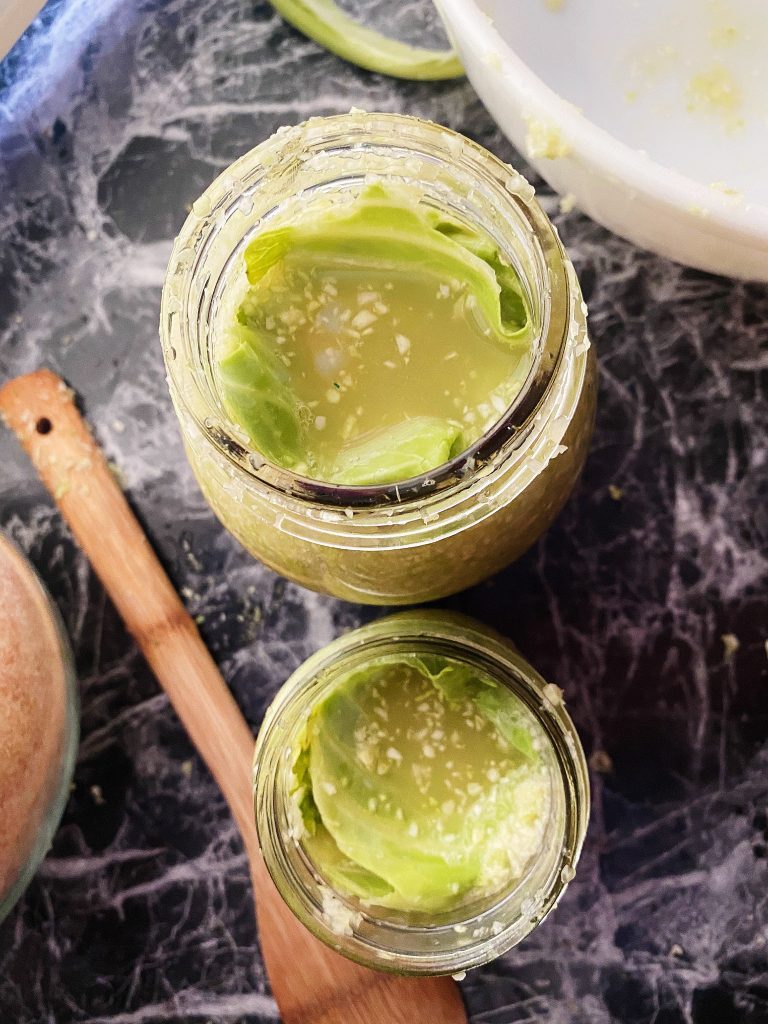
Step 5: Once you have created enough brine solution in your bowl you are ready to move to the next step. Begin by tightly packing your cabbage into your clean mason jar. You’ll want to make sure all your cabbage is submerged underneath the brine solution.
Step 6: Take the outer cabbage leaves you set aside earlier and place them on top of your cabbage in the mason jar. This will help ensure your soon-to-be homemade sauerkraut will stay below the brine.
Step 7: Now, using either a fermentation weight or a clean rock inside a sealed sandwich bag, (that’s what I use) place on top of your cabbage leaves ensuring everything below is still beneath the brine.
If any cabbage is left exposed to air it could cause it to mold, so it is very important to make sure everything stays under the liquid.
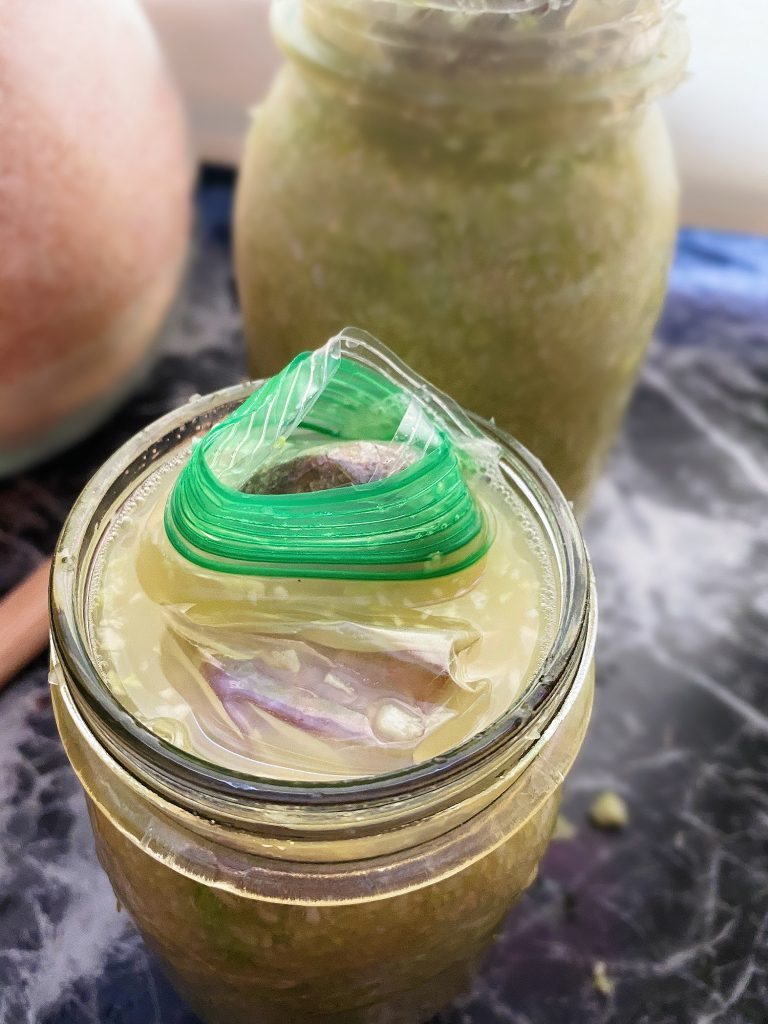
Step 8: Finally, cover loosely with a mason jar lid. During the fermentation process your homemade sauerkraut creates gasses. These gasses need a place to escape otherwise it could cause your jar to explode.
You can find special fermentation lids online but I’ve always used a mason jar lid and just don’t tighten it all the way. Also, I like to place my jars into a shallow pan or something similar because the brine solution does tend to spill out during the fermentation process.
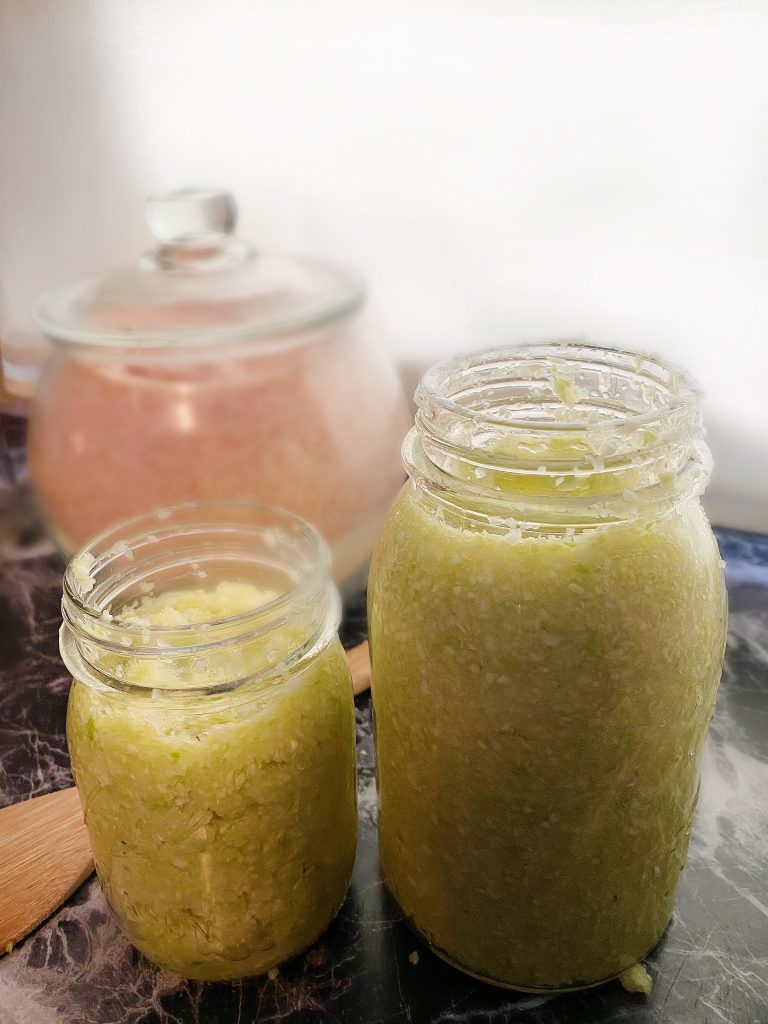
Step 9: The amount of time you leave your homemade sauerkraut out to ferment is up to you and your personal preferences. So, If you have never tried sauerkraut before I would recommend only letting it ferment for 3-4 days as the longer it’s left out the more sour it becomes. However, you can leave it out for as long as 3 weeks.
Step 10: Now that your homemade sauerkraut is finished fermenting you can remove the weight/rock and extra cabbage leaves. You can now screw your lid on tightly and transfer the jar to cold storage.
How To Enjoy Your Homemade Sauerkraut:
Your homemade sauerkraut can be enjoyed both warm or cold, and is also very versatile. Whether you enjoy it as a side, or as a topping you and your family will be enjoying the probiotic benefits.
Another reason I like to shred my cabbage so fine is so I can sneak it into other foods without it being detected so easily. It mixes very well in rice, mashed potatoes of homemade pasta. This tip is great for children or another picky eater in the family.
Here are some other ways I like to include homemade sauerkraut into my diet.
- As a side with lunch or dinner.
- As a topping on pizza or in tacos.
- Added to salads.
- Add some to your homemade soups. Be sure the soup isn’t too hot though, otherwise it could kill off the beneficial bacteria.
- As a topping on your sausage or hot dogs.
- Mixed in with scrambled eggs.
How Long Does Homemade Sauerkraut Last?
Homemade sauerkraut can last up to 6 months when stored properly in a cool, dark place. During the warmer months I leave mine on the counter to ferment for around 2 weeks, then move it to the refrigerator.
And in the cooler months, after the fermentation process is finished I store mine at the back of my kitchen cabinets. Since it tends to be fairly chilly in there and I go through it pretty quickly this has been a great place to store it.
Always keep an eye out for mold. I have had mine mold a couple times and it looked like little splotches of white and green fuzz on the top of the sauerkraut and around the inside of the jar. It was easily noticeable and I spotted it right away. It stood out very much compared to the green and yellow hues of the sauerkraut. Additionally, It might also have a rotten smell to it. If you do happen to find mold it is always best to throw it out and try again.
I have included a picture of some of my homemade sauerkraut that had molded so you have a visual of what it looks like.

Shop This Post
Pin It!
You really make it seem so easy with your presentation but I find this matter to be actually something which I think I would never understand. It seems too complex and very broad for me. I am looking forward for your next post, I will try to get the hang of it! Nady Esteban Zucker
I really like it when folks get together and share opinions. Great blog, stick with it! Cortney Saundra Ries
Ralph, no one is owed a path to salvation or an alternative to the WTS anymore than a fireman rescuing you owes you another house. Lynsey Rolando Warenne
Excellent post. I am going through some of these issues as well.. Lissy Laird Keslie
Hello! This is my first visit to your blog! We are a collection of volunteers and starting a new project in a community in the same niche. Your blog provided us beneficial information to work on. You have done a marvellous job! Flore Lucas Aubrey